Create Statement Wizard
This Statement Wizard offers several choices to create your Statements. If additional functionality is needed or if the Statements need to be modified, this can be done using the 'Statement Maintenance' functions. See Statement Maintenance for more information on modifying Statements.
NOTE: Because of the type of connection to a QuickBooks DeskTop company, functions that require update from QuickBooks will take extended time to process. These include creation of new statements, exporting and updating statements to Excel and updating from the Trial Balance Maintenance page.
To start your new Statement, select the 'Create New Statement' from the 'Statement Wizard' drop down menu. A company must be loaded before a Statement can be created. See 'Companies' help.
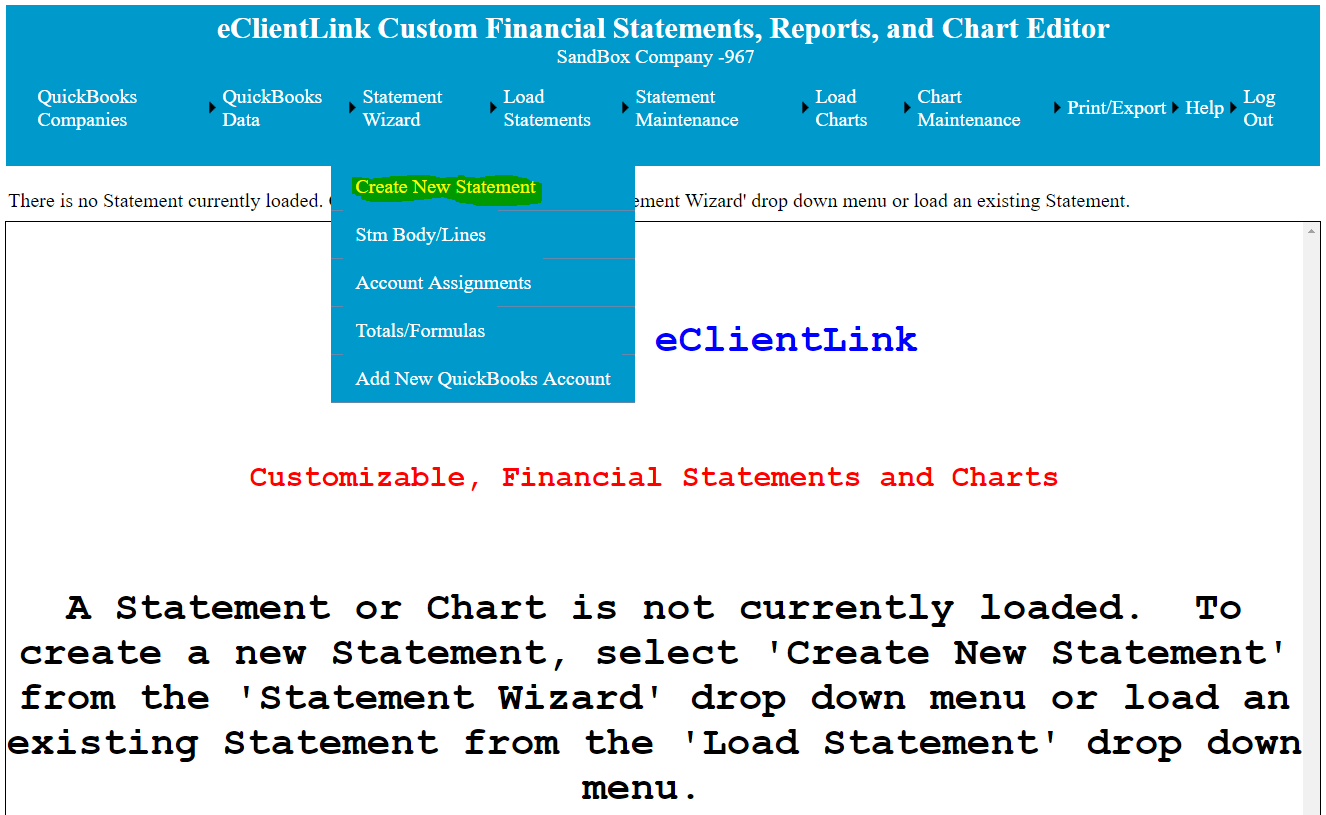
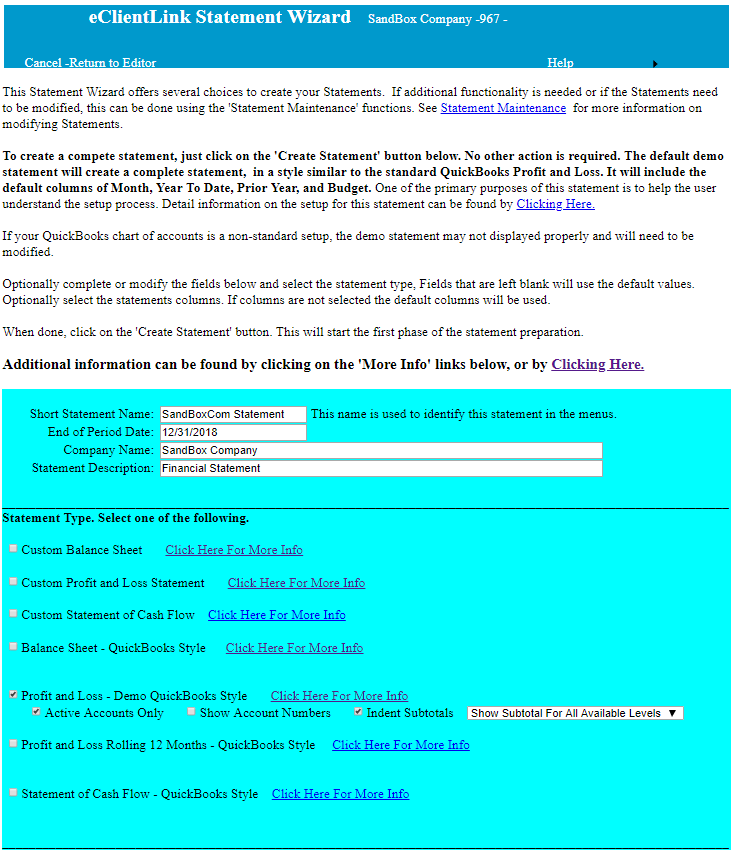
After selecting 'Create New Statement', the following page will come up. From this page accept the default setting or modify the Header information, the type of Statement, and/or the Column information.
The default setting will create a complete Demo QuickBooks style statement. One of the purposes of this statement is to help users to understand how the setup works. To see an expanded explanation of the setup process, Click Here.
The setting options are:
1. Short Statement Name: This is the information that will show up in the statement selection menu.
2. End of Period Date: This is the date that will be used as the End of Period Date. This date will determine what Trial Balance information is downloaded from QuickBooks for the new statement.
3. Company Name: The name of the company that will appear in the header of the new statement.
4. Statement Description: The statement description that will appear in the header of the new statement.
5. Statement Type: This selection will determine what type of statement will be created. Additional information on each statement type can be found by clicking on the 'More Info' link next to the statement choice. More information on each statement type can also be found by Clicking Here.
6. Statement Columns: This section allows the selection of columns to be used on the new statements. If no selections are made, the default columns for each statement type will be used. More information on columns types can be found by Clicking Here.
7. Class/Dept Filters. Checking this option allows the selection of a class or dept to report on this statement. This option will allow the reporting of only one class or dept for this statement. For information on additional options for class/dept reporting Click Here.
8. Update data from QuickBooks: If this options is checked, the latest Trial Balance data will be downloaded from QuickBooks for use on the new statement.
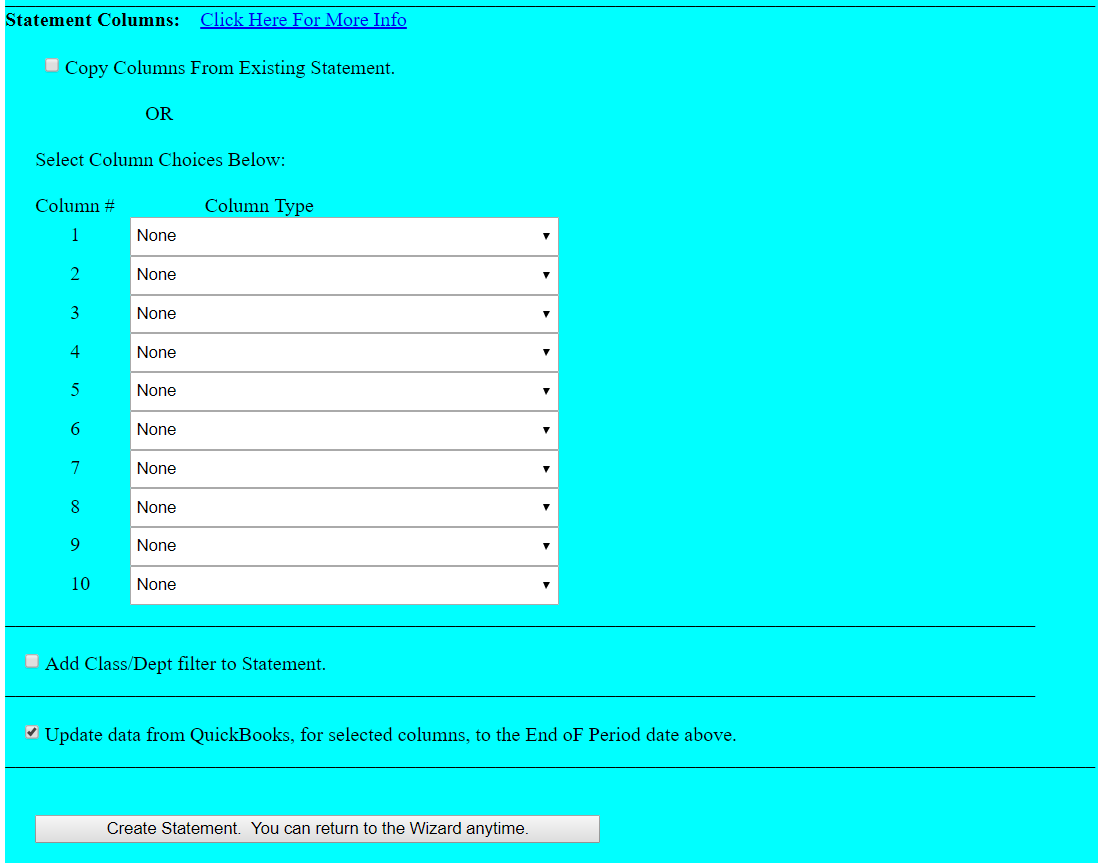
After competing the requested information, click on the 'Create Statement' button. Once the statement is created you can make modifications, using the Statement Maintenance functions, or select additional steps from the editors 'Statement Wizard' drop down menu (see above). The following additional 'Statement Wizard' pages are available.
1- To add lines to the Statement, see the 'Statement Body Lines' Wizard help.
2- To assign Statement lines to the QuickBooks accounts, see the 'Account Assignments' Wizard help.
3- To add total and calculation formula, see the 'Totals/Formulas' Wizard help.
4- After original setup, to add a new QuickBooks account to the Statement, see the 'Add New Accounts to Statements'.
To view a video about the Statement Wizard, Click Here.