Classes/Dept's
When adding a new Trial Balance, it can be filtered by Class, Division, Dept, or Location. See 'Trial Balance' for more information about adding a new Trial Balance.
To create a Trial Balance with only the data from a particular Class, Division, Dept, or Location, select the appropriate Class/Dept from the 'Filter By' drop down box on the appropriate Trial Balance record. By default only one Class/Dept can be included in each Trial Balance. If more than one Class/Dept is needed, contact support about activating the 'Multiple Class' feature for your account.
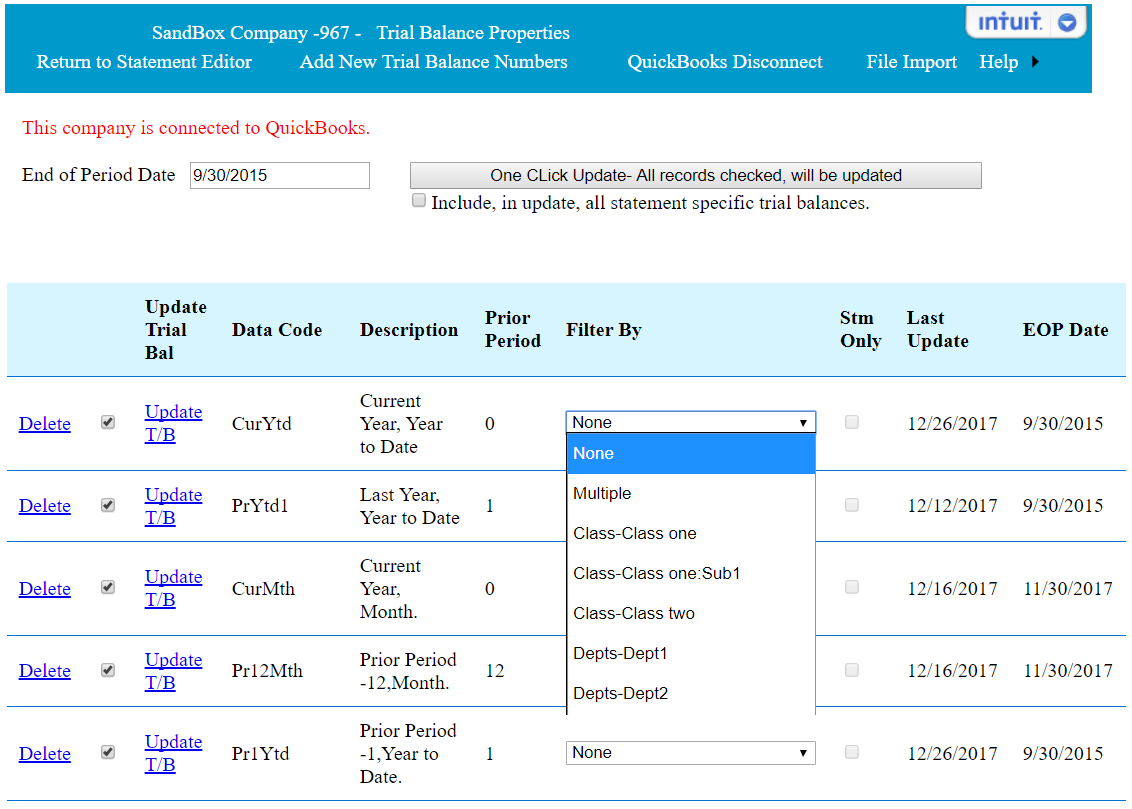
To select multiple Classes and/or Dept's, click on the 'Multiple' option in the filter drop down box. then click on the 'Update T/B' button. This will bring up the following screen.
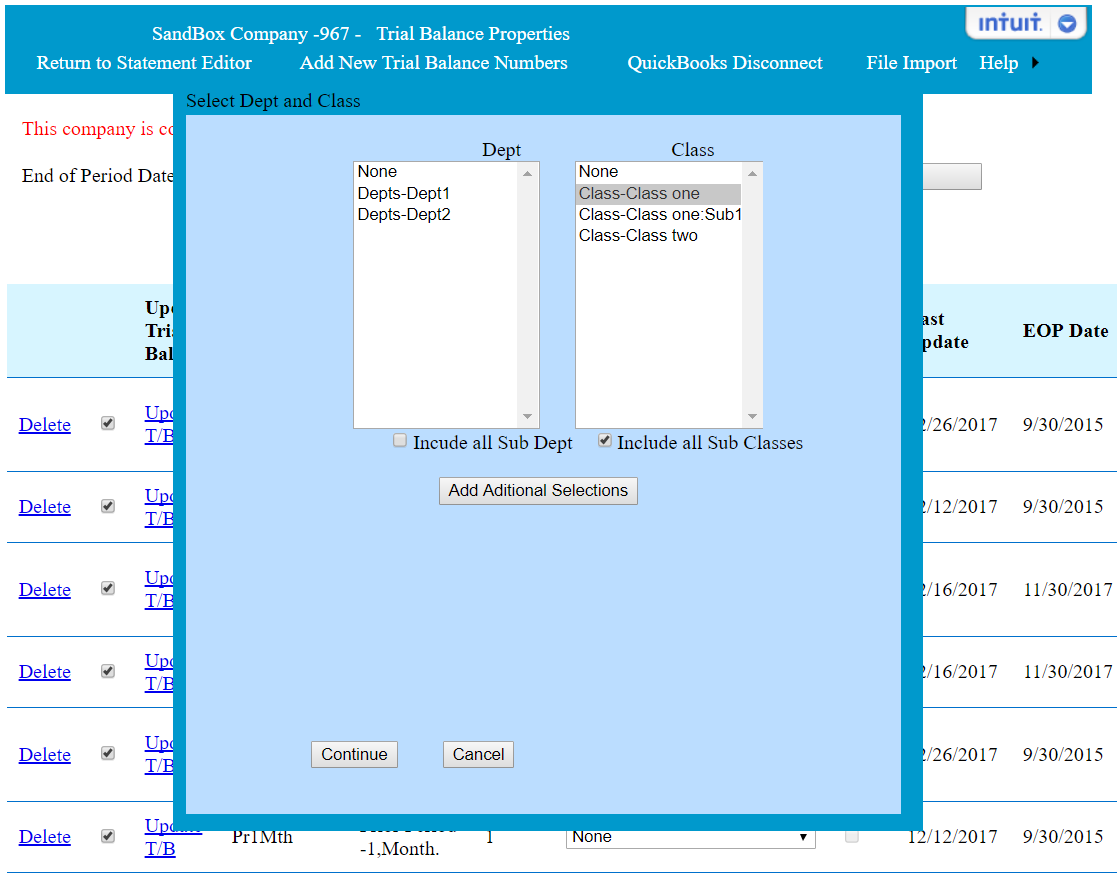
From this screen, select the Classes and/or Dept's that you wish to include in the selected trial balance. If you wish to include all of the sub classes of a class, check the 'Include all Sub Classes' check box. Selections can have multiple selection criteria. To add additional criteria, click on the 'Add Additional Selections' button, then select your next criteria. When the selection is competed, click on the 'Continue' button. Your selection will be saved and the trial balance will be updated to reflect your selections.
Step by Step guild to creating a statement with data from the classes/depts in QuickBooks. The Statement Wizard has the option of filtering a statement by a single class or dept. The following steps are intended to be used when more advanced class/dept reporting is needed, than what can be done using the Statement Wizard.
1. As described above, add all of the trial balances to the company, that will be needed. Each separate column, in the statement, that requires a unique class/dept, will need a separate trial balance. Keep in mind the limitation of the number of common trial balances that can be added to a company, For information on this limitation Click Here.
2. Start a new blank statement using the Statement Wizard with only one selected column. The selected column can be of any type.
3. Then add the necessary columns to the new statements. When adding each column, select the appropriate trial balance that you created in step 1. The one columns that was added in step 2, can be deleted, or the trial balance selection can be changed. This can be done using the Column Maintenance page.
4. Complete the balance of the statement by adding statement lines, assigning QuickBooks accounts to those lines, and adding totaling and formating.