Assign Accounts
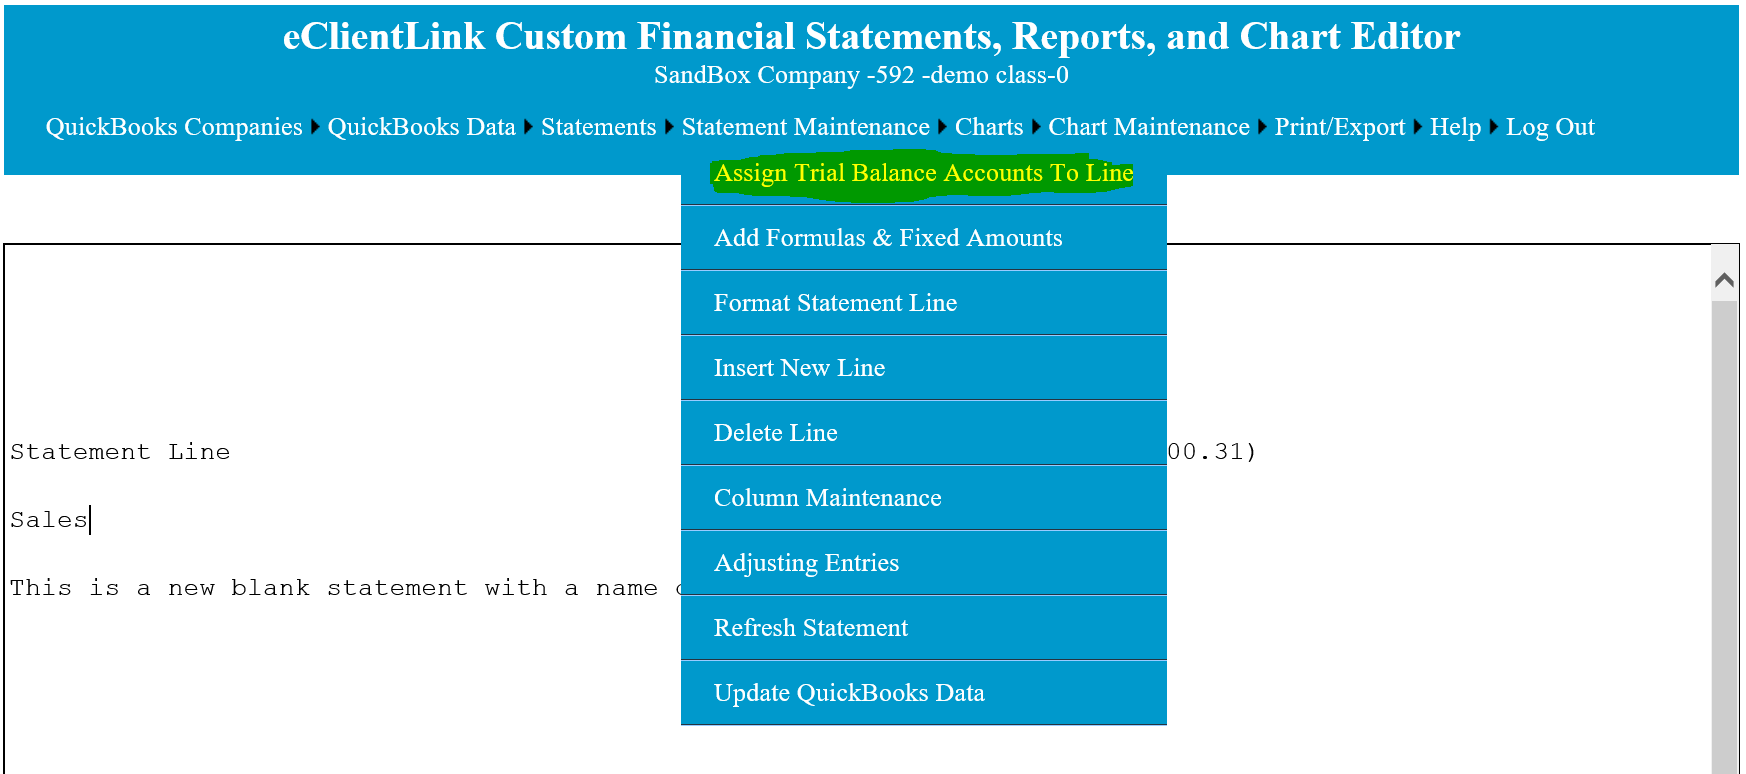
To assign account balances from the Trial Balances to statement lines, select from the 'Statement Maintenance' drop down menu, 'Assign Trial Balance Accounts To Line' , see below. A statement must be selected before the 'Statement Maintenance' menu will be accessible.

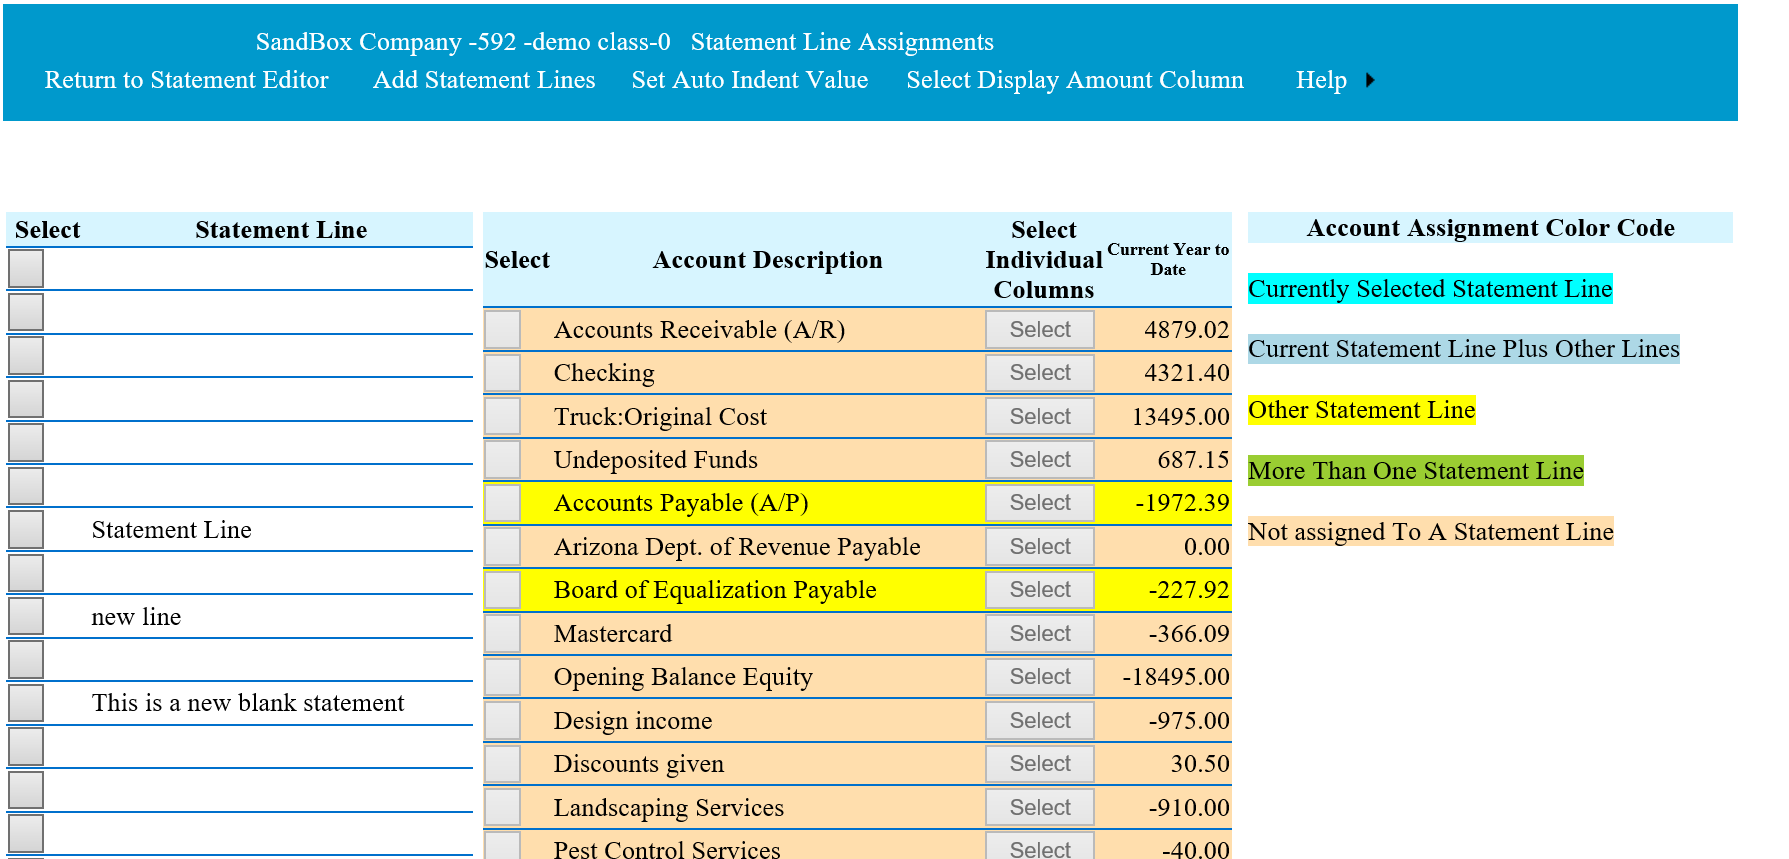
This will bring up the following page. From this page you can assign any Trial Balance account(s) to any statement line.
To assign a QuickBooks account to a statement line:
First click on the 'Select' button in the left list for the statement line that you wish to assign an account.
Second click on the small 'Select' button on the Trial Balance accounts on the right. You may click on as many accounts as you wish and in any order. All the accounts will be totaled and shown in the appropriate columns on the statements. The statement line and account descriptions will be highlighted for the selected lines and accounts.
To delete an account assignment from a statement line:
First click on the 'Select' button on the left side list for the statement line that you wish to delete an assignment. The accounts that are assigned to the statement line will be color coded to reflect the account is currently assigned to the selected statement line.
Second click on the small 'Select' button on the Trial Balance accounts on the right. You may click on as many accounts as you would like. The Account Assignment Color Code witl change to reflect the status of that assignment. By repeatedly clicking the 'Select' button the assignment status will change between assigned and not assigned.
The Trial Balance accounts are color coded to help determine which accounts have been assigned. You can also determine this by running a grouping schedule report.
On the right side of the 'Account Description' listing, is the current trial balance amounts for the selected currently loaded statement. To change the displayed selected trial balance, click on the 'Select Display Amount Column' and from the pop-up select the trial balance that you want to display. To add additional trial balances to the currently loaded statements see 'Statement Column Maintenance' .

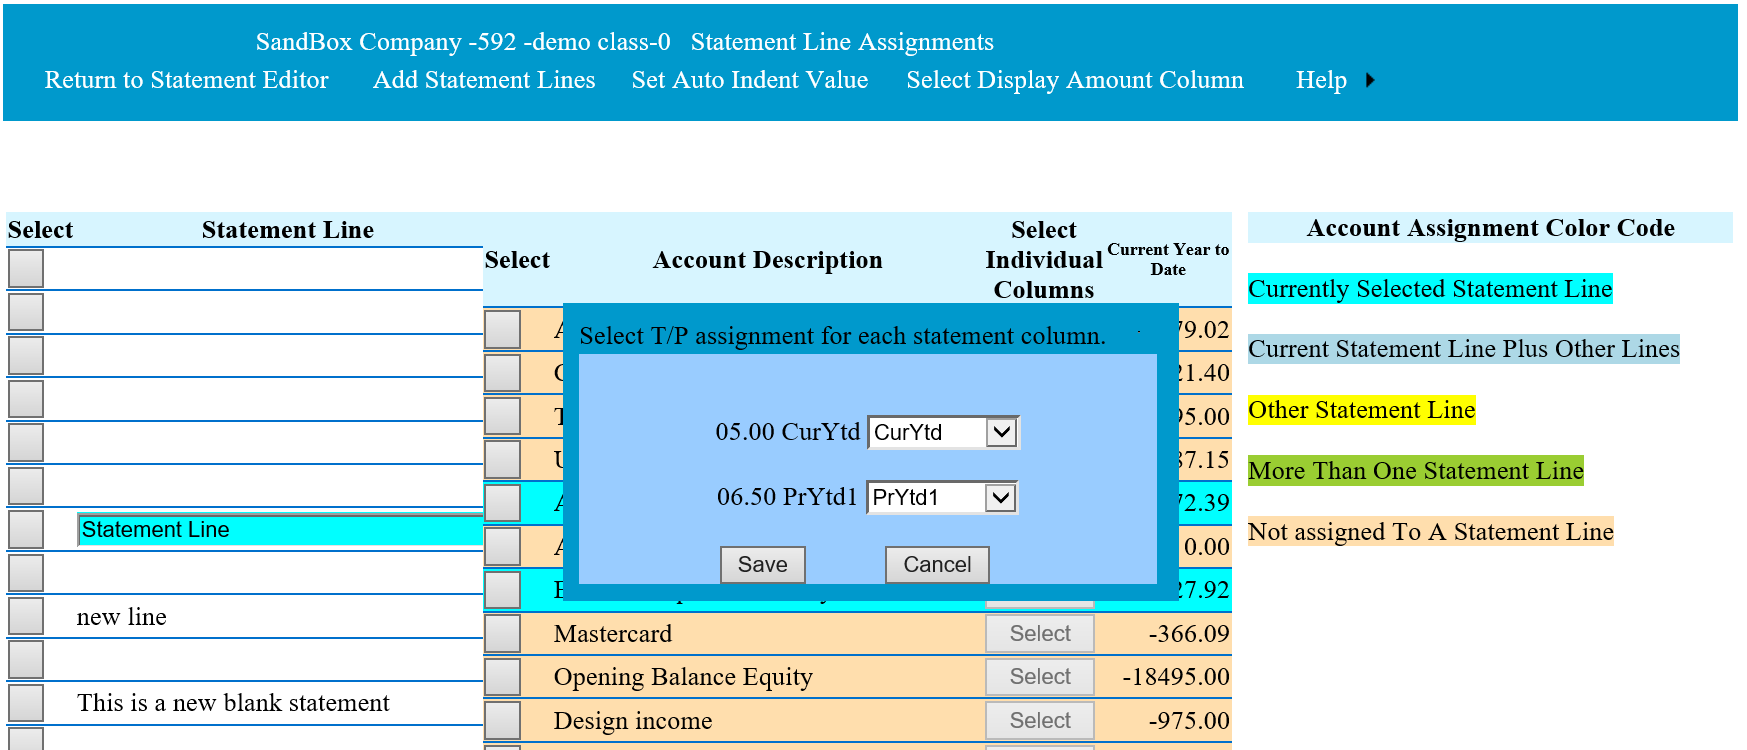
By default, the numbers that will display on the statements, will come from the default setting for the columns. This can be overwritten by, after you have clicked on the 'Select' button on the account listing, then click on the 'Select' button next to the account description. From the pop-up, select, for each statement column, the Trial Balance data you would like to show in the column on the statement. Select 'Calculation' if you want the column blank or plan on entering a formula for that column on the selected line. See example below. Each statement column is listed with a drop down box next to it from which you can select the Trial Balance account you wish to use for that column.

You can do a quick statement line add by selecting a blank line from the statement lines on the left side, then click on the account you wish to add. This will place the account description on the statement line and will assign the account to that line. If you wish to have the quick add accounts indented, set the amount of the indent by selecting the 'Set Auto Indent Value' menu item.
Additional lines may be added to the statement by selecting the 'Add Statement Lines' menu item.
If any new accounts are added to QuickBooks or any previously inactive account are used since the original setup, they will have to be assigned to the appropriate statement lines. You can verify that all active accounts have been assigned by running the appropriate reports in QuickBooks and comparing the totals to the eClientLink statements. You can also determine the statement account assignments by hovering your mouse over the account in the Account Description column on this page. A small help screen will appear with the name of the statement line assignment. The Statement Wizard 'Add New QuickBooks Account' can also be used to add new account. see the 'Add New Accounts to Statements' for more information on this function.