Reset Web Connector
In order for the eClientLink app to get information from QuickBooks desktop version, the QuickBooks Web Connector program must be running on the same computer where QuickBooks is located.
If after installing the Web Connector, it is not communicating with eClientLink, you can review the following trouble shooting information. It may also be necessary to reset the Web Connector installation and reinstall it.
Troubleshooting:
1. The Web Connector must be running on the same machine where the QuickBooks program is normally run. It can be hidden by clicking on the 'Hide' button, but it must be running. The QuickBooks program does not normally need to be running. In some cases, leaving the QuickBooks running may solve the problem. If this happens it is usually a security issue. Please contact support at support@eClientLink.com, for more information on the possible security issues.
2. The Web Connector must be configured to Auto-Run every 1 minute. By watching the program you should be able to see that it is contacting eClientLink on a regular basis to exchange information.
3. The QuickBooks preferences for the eClientlink App must be set to 'Allow this application to log-in automatically'. This setting can be found in the QuickBooks program at Edit/Preferences/Integrated Applications/Company Preferences. From this page highlight the eClientlink app and click on 'Properties' .
4. If getting an error "QuickBooks File Can't be Opened". Try setting both the QuickBooks file and the Web Connector to run as administrator. Always run as admin from a shortcut: Right-click on a shortcut file > Shortcut tab > Advanced > Check the box to "Run as administrator". Both programs must be set the same.
5. If your computer is rebooted by you or automatically (windows update), the Web Connector may need to be restarted. To make the Web Connector auto start on reboot, add it to the startup folder. For more information on this, do a search on google for "auto start programs windows". Depending on your original setup, the Web Connector may already be in the startup folder.
6. If your computer is going to 'Sleep', the Web Connector will also go to 'Sleep' and will not response to requests.
To disable automatic Sleep:
- Open up Power Options in the Control Panel. In Windows 10 you can get there from right clicking on the start menu and going to Power Options.
- Click change plan settings next to your current power plan.
- Change "Put the computer to sleep" to never.
- Click "Save Changes"
7. If you have updated your QuickBooks software to a newer version, you may need to reset the Web Connector program and rerun the company setup procedure.
8. If the connection to eClientLink continues to fail to work, it may be necessary to reset the Web Connector program (see below) and rerun the company setup procedure. In some cases, It may be possible to rerun the company setup procedure and not reset the Web Connector program.
9. If the connection continues to fail, please contact eClientLink support at support@eClientLink.com .
Following are the steps to reset the Web Connector.
1. Remove the eClientLink application from the Web Connector. For this step the QuickBooks program and the Web Connector must be open. In the Web Connector program click on the 'Remove' button next to the eClientLink application.
2. In the QuickBooks program open the 'Integrated Applications' pop up window (Edit/Preferences/Integrated Applications/Company Preferences). The following pop-up window will be displayed.
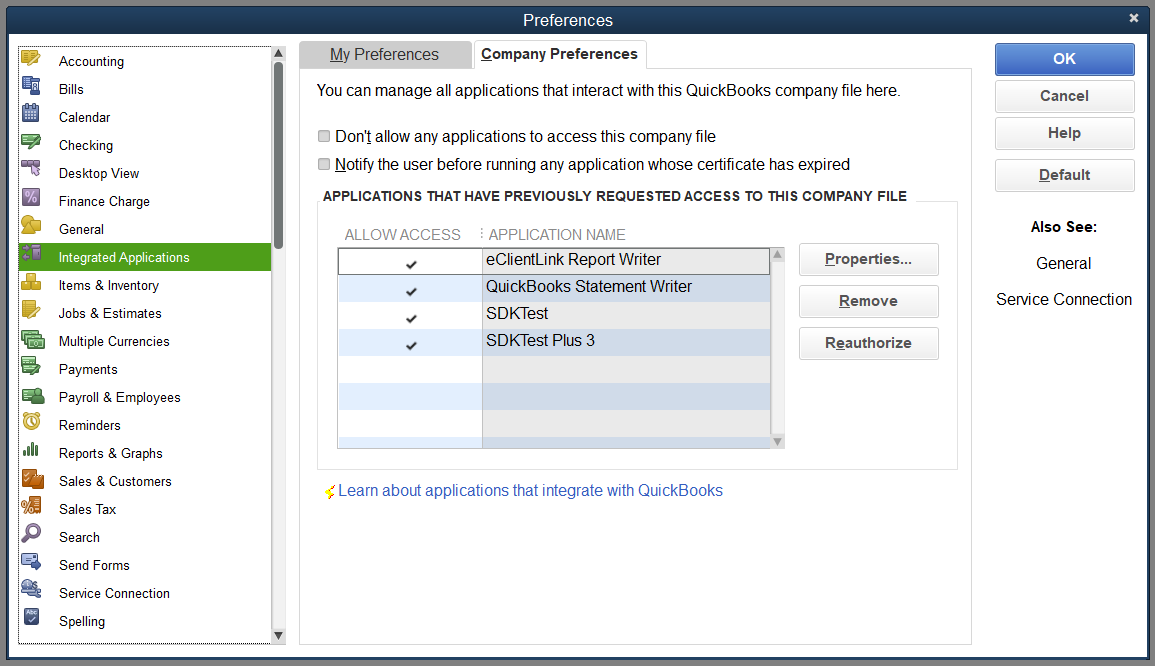
Select the eClientLink Statement Writer application, and click on 'Remove' . Then click on OK. This completes the resetting of the Web Connector.