Column Header Maintenance
Statement column headers can be added and modified from the 'Edit Column Header' pop-up, on the Column Maintenance page.
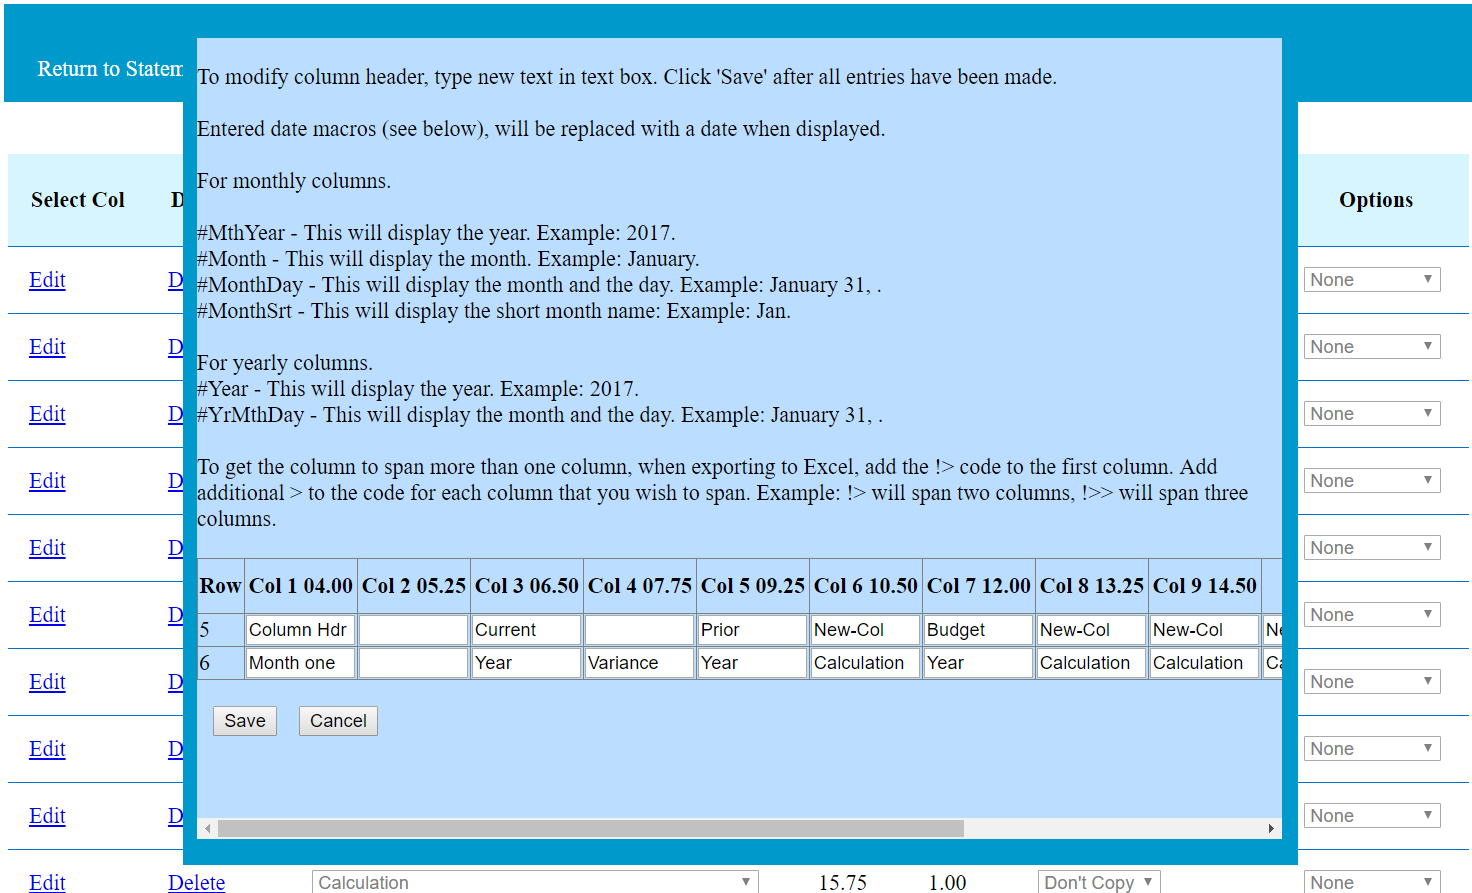
From this pop-up, enter new or revised column header text. Click on the save button when changes have all been entered.
Date macro codes can also be used with column headers. When the statement is displayed, they will be replaced by date information, as described below.
For monthly columns.
#MthYear - This will display the year. Example: 2017.
#Month - This will display the month. Example: January.
#MonthDay - This will display the month and the day. Example: January 31, ,
#MonthSrt - This will display the short month name: Example: Jan.
For yearly columns.
#Year - This will display the year. Example: 2017.
#YrMthDay - This will display the month and the day. Example: January 31, .
#NMths - The number of months in year to date. Example: 3
Span more that one column when exported to Excel. To get the column to span more than one column, add the !> code to the first column. Add additional > to the code for each column that you wish to span. Example: !> will span two columns, !>> will span three columns.
To add a new column header row, from the 'Add Formulas & Fixed Amounts' on the 'Statement Maintenance' drop down menu, add new column header to a blank row.
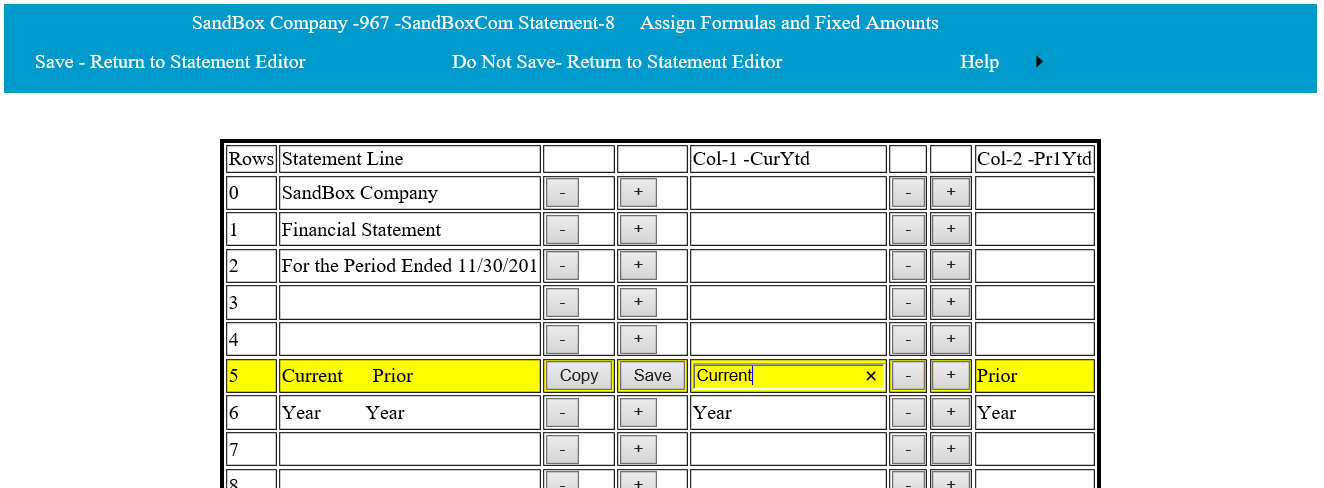
From this page, click on the text box for the header you wish to add, then type in the new header. After entering the header click on the 'Save' button and the "Return to Statement Editor' menu item. See row 5 above. When returning to the Editor, refresh the statement to display all changes. ('Refresh Statement' from the 'Statement Maintenance drop down menu.) If a new blank line is needed, insert a new line using the 'Insert' menu item from the 'Statement Maintenance' drop down menu.