Before a DeskTop company can be connected to the eClientlink App, the QuickBooks Web Connector Software must be loaded and setup on the same computer that is running the QuickBooks program. This is a one time installation. Follow the step below
to compete this task.
1. Open QuickBooks, the Company, and the Web Connector on this machine. The Web Connector
can be opened from the QuickBooks Desktop File/Update Web Services menu.
2. Click this button:
3.
After the Download is competed, open the downloaded file by clicking on the download.
It will automatically be added to the Web Connection program.
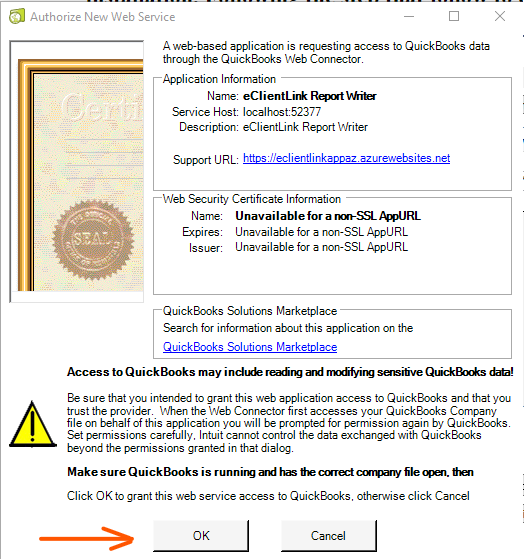
4. A Web Connection popup will appear. See Below. Click on the OK button.
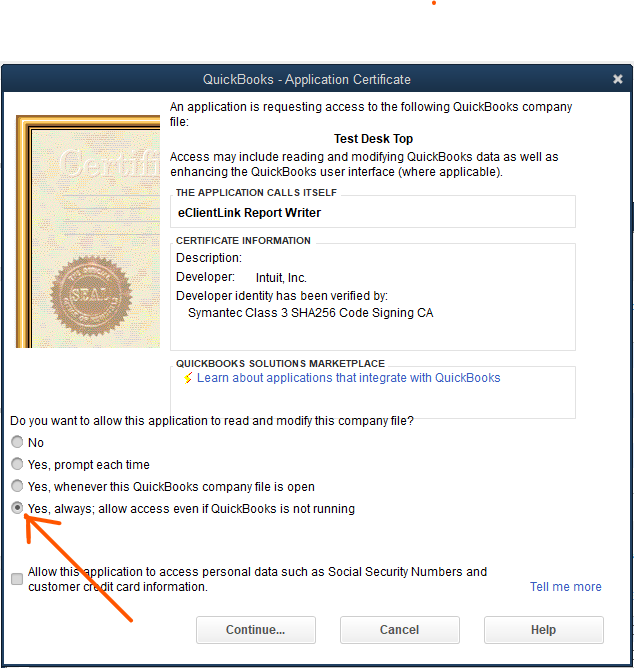
5. A QuickBooks popup may also appear. See Below. Click on
the 'Yes, always allow...' check box.
6. The Web Connector will then open showing the newly added record for eClientLink.
See below. Wait about one minute for a popup that will ask for a password. Enter
the same password used on your QuickBooks file.
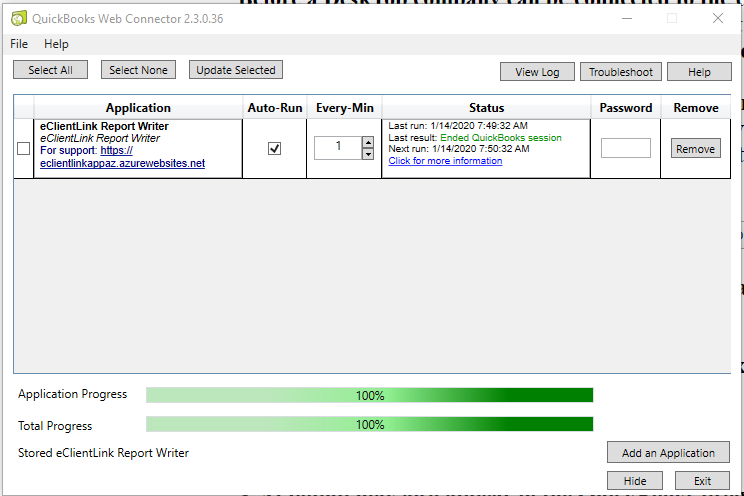
7. An update will then run. If the update returns without an
error, the Web Connector has been successfully installed.
8. The Web Connector program must be left running on your machine for eClientLink
to communicate with your QuickBooks file. You may close the QuickBooks program and
hide the Web Connector program. Don't exit the Web Connector. It must must be
left running.
9. When you return to the eClientLink App, your Quickbooks company will appear under
the QuickBooks company drop down menu
For more information on Web Connector installation and setup,
click here
. A help screen will open in a separate window.